Thursday, January 23, 2014

Take a New Direction with MSC's Auto Body Program

Looking for a new direction with your career? Check out the Maricopa Skill Center Auto Body program!  

This January an exciting new enrollment plan launched for the Auto Body program at MSC. Students are now moving through the Auto Body Basic Metal Repair and Refinishing certificate program as a cohort. The students will finish the program in mid August.

Program details: 
Students are in class from 8 a.m.-2:30 p.m. Monday-Thursday. It is a 1011 clock hour program that takes approximately eight months to complete.

What students learn while in the cohort:
Students first have essentials for auto body and then move onto Occupational Safety and Health Administration standards for auto body.
Next is the Introduction to Repair. Students learn MIG welding, paint-less dent removal and plastic bumper repair. Students learn how to repair 3 panels and one plastic bumper during their time in introduction.
After that, there is Introduction to Refinishing. The students paint the panels they repaired in the Introduction to Repair. Once painted, students learn detailing of vehicles.

Students then move to Auto Body Metal Repair where they learn frame repair and using a frame alignment machine. Students are required to work on one vehicle to finish the section of the course. Students’ personal vehicles can be worked on or they can team up with a classmate who has one.
To finish the program, students then move onto Auto Body Refinishing and they are required to refinish the vehicle they repaired.

I-CAR Certification:
All students have to pass Inter-Industry Conference on Auto Collision Repair certification exam before graduation. I-CAR is an international organization dedicated to the training in collision repair. The certification helps the student look more marketable when applying for jobs. The students complete a total of 14 tests to get certified. All tests are taken online and at the students convenience.

After graduation:
The students can look forward to apprentice level jobs as painters or metal repair in shops.

Next program start dates: 
May 5 (Must be enrolled and have taken assessment by March 10th)
July 7 (Must be enrolled and have taken assessment by May 19th)
Aug. 25 (Must be enrolled and have taken assessment by June 30th)

Find out more! Call 602.238.4350. Visit the websitePublic tours are available 9:30 a.m. Tuesdays and Thursdays.

Wednesday, January 8, 2014

Take a New Direction with MSC's Aesthetician Program


Looking at a new direction of a better career? Check out the Maricopa Skill Center Aesthetician program!

What is an aesthetician? An aesthetician is someone who specializes in skin care.

What do aestheticians do? Facials, waxing and makeup are some of the services aestheticians provide.

Where do aesthetician work? Some prospective jobs in aesthetics are at day spas, medical spas, resorts, salons and private practices. Aestheticians can specialize in skin conditions; for example, acne, aging and rosacea. 

What are the requirements to practice aesthetics? Practitioners have passed a state board and received an aesthetician license. The state board exam consists of a 100 question written test and hands on demonstrations.

Aesthetician Program at MSC: 
Students are in school 8:30 a.m.-2 p.m. Monday-Friday. The first half of the day consists of lecture and textbook work. The second half of the day is hands on experience. Students perform the skills learned on mannequins and fellow students. After 16 weeks students move to a clinic setting. 

What students learn: 
Students first learn sanitation and work station set up. Sanitation is the number one priority for the Arizona Board of Cosmetology and very important for the board exam.
Students then move into the basics of a facial. Steps to a facial, the building blocks and protocols like consultation, exfoliation and extraction are learned. Advanced protocols are learned as the course goes on. Students get to hone in on certain techniques as they progress. For example, facial message techniques are something students continue to work on.
After basics are learned students also move onto learn the machines used in facials. Some machines learned are microdermabrasion, ultrasound and high frequency.
Waxing is the next step for students. About a week is spent on each soft and hard wax. After completing this section students usually have a waxing day once a week to continue building skills.
Back treatments are learned next. Students learn how to do mud and body wraps.
Makeup is the final section learned for students. Day, evening and special occasion makeup is taught.
Throughout the course students learn about ingredients and product education to ensure they know what ingredients can be most beneficial to a client. Also throughout the program, students learn the art of retail for aesthetics. Students learn about how to provide customers with the best products for at home use.
“We help you build the foundation of aesthetics,” said Aesthetics Instructor Shala Dveirin.

The Clinic:
After students have completed the first 16 weeks they move to the clinic setting. The school has a salon open to the public. Students in the clinic setting provide facials, waxing, makeup and back treatments to clients. Instructors supervise and receive feed back from clients to make sure students are providing adequate service.
“We want them to go out confidently into the industry,” Shala said. “Everyone comes out ready for state boards.”

Next program start dates: March 24, May 12
*Enrollment & Fiancial Aid process needs to be started approximately six weeks prior to course starting.

Program details: It is a 630 credit hour program that takes approximately six months to complete. Students spend 25 hours a week in the classroom. Estimated cost: $3,882.00. The program is offered at MSC, 1245 E. Buckeye Road, and the Northwest campus, 2931 W. Bell Road.

Find out more! Call MSC 602.238.4350; Northwest Campus 602.392.5000. Visit the aesthetician website
Public tours are available 9:30 a.m. Tuesdays and Thursdays. 


Tuesday, September 17, 2013

The Opening of Maricopa Skill Center Northwest Campus

Maricopa Skill Center Northwest Campus on 29th Ave. and Bell Rd.
The doors are finally opened! Maricopa Skill Center (MSC) Northwest Campus has expanded its campus to the Northwest Valley and officially opened its doors to the public this past August. While the Cosmetology and Aesthetician programs are currently open for enrollment, additional programs in Business & Technology, Health Care, and Trades are in progress of development.

Student Services front desk at NWC.
Brand new furniture (Goodmans Interior Structures) and equipment have been installed at the Northwest Campus to meet the needs of students, instructors, and staff. As you can see, here is our before and after progression:

Lecture Classroom


Cosmetology Classroom


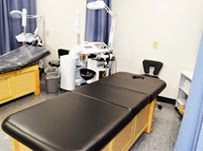
Aesthetician Classroom/Clinic


Cosmetology Clinic/Salon


Want to see more? Stop by for a tour at our brand new campus located on 2931 W. Bell Road in Phoenix. For more information, call 602.392.5000 or email us at mscnorthwest@gatewaycc.edu.

Stay tuned for more updates!

Wednesday, May 22, 2013

Program of the Week: Precision Machining


Precision Machining: CNC Machinist 

Imagine having a big piece of metal that can be transformed into an intricate shape, perhaps a tool, or maybe a piece that will connect to form an operating motor. This can all be done with precision machining, which is where machinists work in teams to convert raw materials into durable goods by using computer numerical control (CNC) machines and various tools.

The tools and parts necessary for Precision Machining at Maricopa Skill Center.

The Precision Machining program offered at Maricopa Skill Center provides its classes at GateWay Community College. Students from the Precision Machining program demonstrate the functions of various CNC machines.

CNC Machines
The CNC Lathe and CNC Mill machines can be operated both manually and by the help of a computer. When a student is operating a machine with the help of a computer, a Secure Digital (SD) card is used to encode and process the information to function. 

Student, Jeff Stewart, carefully controls the crank handle for the vertical milling machine.
  • CNC Lathe - The cutting tool remains stationary while the metal piece is being turned. This creates round parts running per programmer's code.
  • CNC Mill - Compared to the lathe, the cutting tool is moving while the metal piece remains stationary. This creates square parts running per programmer's code.
Student, Andrei Dejanovich, organizes his drills before starting on a project.

Vertical Milling Machine
The functions of this machine are similar to the CNC Mill except that it is controlled and operated manually. While operating this machine, it is crucial to carefully steer the table feed handwheel while the shape is being processed. 

Surface Grinder
A surface grinder is manually operated and is the finishing process that creates a smooth precise finish on flat surfaces. This gives the metal piece a more refined appearance.


The surface grinder (left) and the precise finish of a metal piece (right).

As you can see, CNC machinists possess skills and knowledge of being able to control and program CNC machines. Since these skills are in great demand, CNC machinists become more educated especially with today's advanced technology.

Projects created by CNC students at Maricopa Skill Center.


Stay tuned for the next program highlight: Welding!


Friday, May 3, 2013

Program of the Week: Construction Trades

Construction Trades: Rough Carpentry Framer

Most say that a dog is a man's best friend. When he's feeling upset, his dog always finds a way to accompany him. When he's in need of someone to talk to, his dog is always there to listen. When he succeeds, his dog is there to celebrate. So, what better way to return the favor by providing him with security and warmth with a fabulous doghouse? 

Students from the Construction Trades (YouthBuild) program at Maricopa Skill Center demonstrate proper instructions on how to build a doghouse. 

Instructor, Marc Woehl (left), assists students in using a jig saw. 


Materials and Tools:
Goggles
Palette
Plywood
2x4 Boards
Roofing Shingles
Nails
Paint
Paint Brushes
Skill Saw
Jig Saw
Sallzall
Miter Box
Nail Gun


Building the Foundation
A 28x32 palette is used to build the foundation of the doghouse. Plywood is nailed to the top of the palette to cover the frame.

Constructing the Walls
To construct the walls, chalk lines are made on the foundation to lay out where each will be placed. The walls are then assembled using a nail gun. In addition, doors and windows are laid out and measured for proper cutting.

Student, Adam Clark, uses a miter saw for trimming.

Framing the Roof
The layout of the roof is determined by calculating the roof's slope and distance.
The wall is then marked at the top to indicate the placement of each rafter, which is measured at every two feet. After the measurements of the rafters are checked, they are assembled by nailing the structures together. The rafters are then sheathed with 1/2 inch plywood.

Installing Roof Shingles
The length and width of the roof are measured to determine how many shingles are needed. Once the first row of shingles are aligned at the bottom edge of the roof, they are installed by hammering the nails in. The process of this is repeated for the next following rows.


Student, Walter Elera, applies a coat of paint.
Preparing for Paint
The doghouse is then examined for imperfections by using a caulk gun to fill in the gaps to prevent water from leaking in. After this process is completed, primer is applied around the doghouse.

Painting the Doghouse
After one coat of paint was applied to the doghouse, it took about 24 hours for it to completely dry. 


Well, would you look at that? Although it takes a lot of time, effort, and skill to build a doghouse, the owners are definitely proud of their home sweet home.

Thank you to our instructor and students for doing such marvelous work. As a matter of fact, these houses were presented at the Home and Landscape Show last April.

Stay tuned for next week's program spotlight: Precision Machining!

Wednesday, April 17, 2013

Program of the Week: Meat Cutting

Apprentice Meat Cutter


Packaged retail meats in the Butcher Shop & Deli at Maricopa Skill Center.

Imagine wearing winter clothes all year-round in Arizona. In fact, none of us would survive especially in the middle of July! But, in the Meat Cutting Program at Maricopa Skill Center (MSC), students wear jackets and beanies to keep themselves warm. The average temperature inside the meat cutting room is set at approximately 30-40ºF to maintain proper sanitation.

Diagram of Beef Primal Cuts
MSC's Meat Cutting Program receives domestic orders from vendors, which arrive in large, divided sections called primal cuts (as shown in the diagram). The students process and handle these primal cuts into individual retail cuts.

Students in the Meat Cutting Program demonstrate proper steps in preparing beef ribs and beef top sirloin for merchandising a retail meat case and for filling customer orders. 
_____________________________________________________________________

Beef Ribs


Step 1: A section of the beef rib area is carefully placed under a band saw to slice each piece.


Step 2: After each beef rib is sliced, the piece is examined to see if there is any bone dust, which is removed by a scraper.


Step 3: Any excess fat is trimmed using a 6-inch boning knife.


Step 4: A tray and clear wrap is used to package each beef rib.


Step 5: After the trays are sealed and labeled, they are merchandised in a retail meat case.
 _____________________________________________________________________

Beef Top Sirloin


Step 1: Each beef top sirloin is cut into any thickness the customer desires. The knife used to cut this is a 12-inch steak knife.


Step 2: This measuring tool was actually custom-made from the Precision Machining Program at GateWay Community College. It is used to accurately slice the thickness of the meat in different measurements.


Step 3: The beef top sirloin pieces are packaged in a freezer wrapping paper.


Step 4: The packages are then boxed up and ready for customers to pick up.


 _____________________________________________________________________


Butcher Shop & Deli at MSC.

As you can see, there are interesting steps that goes along processing and handling different types of meats. The next time you're shopping at the grocery store, you'll know exactly what's going on behind the counter in the meat cutting room.

Stay tuned for the next blog spotlight: Construction Trades!

Wednesday, April 3, 2013

Program of the Week: Health Care

Ophthalmic Assistant Training

Do you remember the moment where the sign across the street appeared blurry to you? Did you force yourself to squint so hard just so you can read what the words were saying? If so, you should probably make an appointment for an eye exam ASAP!

So, what can you expect in an eye exam?

Students from the Ophthalmic Assistant Program at the Maricopa Skill Center demonstrate the process of a preliminary eye exam that is completed before meeting with an ophthalmologist.

Kerotometer in the Ophthalmic classroom at the Maricopa Skill Center.

Medical History
The patient is asked if there are any known medical histories that could include complaints, allergic reactions, medications, diabetes, injuries, and surgeries. 

Visual Acuity Test
This test is done to measure the sharpness of the patient's vision. He/she holds the occluder to cover one eye at a time while reading a Snellen chart or the near vision card. 

MSC students assist one another through a preliminary eye exam. 
Visual Field Test
The patient is tested to see if he/she is able to see if they have peripheral vision around their visual field. This tests for any early signs of glaucoma, which is an eye disease where the nerve in the back of the eye is damaged.

Extraocular Muscles

This test examines the patient's eye muscles, which is identified as extraocular muscles. This is done using two fingers to make an "H" pattern to check that all muscles are intact. 


Pupil Constriction
A pen light is directed towards the patient's eyes to check if it shrinks (constriction). The light is pointed directly at one eye at a time to see if the other eye reacts equally. When light is flashed at one eye, both pupils should constrict.
 
Instructor Pat Lamb (left) shows how a direct ophthalmoscope is used.

Other Eye Tests
There are other tests that are done while using different instruments to examine the inner eye. Instruments include a tonometer, a direct ophthalmoscope, or  a slit lamp that's mounted on an exam chair.

Tonometer
This is used to measure inocular pressure, which is the inside pressure of the eyes. If there is pressure it may indicate the beginning causes of glaucoma.


Direct Ophthalmoscope
This is a magnified tool that is used to examine the retina, which is a thin tissue layer of the back of the eye. It has a mirror where a blue light reflects into the eye.

Hand-held Slit Lamp
This lamp is also known as a biomicroscope. Before this test is done, orange drops with fluorescein are put into the white area of the eye to indicate any scratches in the surface of the eye. This examines the cornea, iris, pupil, lens, lashes, and lids.

Pat Lamb assists Ophthalmic students how to use a tonometer and a direct ophthalmoscope.

As you can see, getting an eye exam simply doesn't mean you're going in to get prescription eyeglasses or contact lens. Your eyes are being checked for eye disease and overall health!

Stay tuned for next week's program spotlight: Meat Cutting!